Showing posts with label Recipes. Show all posts

Monday, July 27, 2015

Recipe: : Homemade Kettle Corn

I recently had the pleasure of trying out some yummy flavored organic coconut oil. I didn't even know such a thing existed before a couple of weeks ago. One of the flavors I had on hand was lemon-ginger. I wanted to do something unique with it. I decided upon kettle corn! I've made kettle corn in the past, but had forgotten where my recipe went and had to do a little Pinterest hunting before I found just the right one. Of course, I tweaked it a little. The results were amazing! 

Homemade Kettle Corn
 (note -  I made this recipe in a hand cranked popcorn maker)

* 1/4 cup oil (I used lemon-ginger flavored coconut oil)
* 1/4 cup sugar (I used Zulka brand)
* 1/2 cup popcorn kernals
* 1 tsp. real butter
* 1 tps. real vanilla extract
* salt to taste

1. First place your popcorn maker on medium heat.
2. Add your coconut oil, butter, sugar, & vanilla extract. (let it all come together for a few seconds.)
3. Add your popcorn kernals
4.  Turn the heat up just a little bit. (medium/high-ish, to really get the kernals popping, but not to burn the sugar.)
4. Turn the handle every few seconds until you really start to hear the kernals popping, then you will want to turn the handle constantly.
5. Once the kernals start really popping, turn the heat back down to medium.
6. Crank until you don't hear anymore kernals popping., then transfer to a large bowl. 
7. Once in the bowl, add salt to taste. Since the popcorn is a little sticky at first, you might want to use a spoon to help break up the popcorn as you add your salt. 
8. That's it! Now it's time to enjoy! 

(I did some brand dropping in this post, but I assure, I am not getting paid for it. These are brands that I use and trust and I'm simply passing along their awesomeness.)


Wednesday, August 20, 2014

Recipe: : Philly Cheesesteak Mac n' Cheese

There are very few things that taste better than a good Philly cheesesteak sandwich. You just can't beat the ooey gooey cheese, the sauteed peppers and onions and the meat....oh that glorious steak! I recently decided after seeing a pin for a Philly cheesesteak & Mac n' Cheese mashup that I would create my own version.

Ingredients

* Noodles (any kind of short noodle will work, I used callentani noodles)
* Steak-Umm sliced steaks (I used 7 slices)
* 4-6 mini sweet peppers, sliced thin
* 1 small red onion, sliced thin
* 4 Tbs. Butter
* 2 cups fresh grated Monterey jack cheese
* 2 cups fresh grated mild cheddar cheese
* Approx. 4 cups of milk (I used whole milk)
* Approx. 1/4 cup unbleached all purpose flour
* 1/2 cup of panko bread crumbs
* Salt & pepper to taste


To Make

1. Boil the noodles as directed, drain and set to the side
2. In a heavy bottomed soup pot (on that you can bake in is best), melt your butter
and then add your onions and peppers. Saute on a medium-high heat until soft and a little blackened.
3. Add your steak slices and with a spatula, chop up the steak pieces to your liking, cook thoroughly.
*now is the time to pre-heat your oven to 400 degrees F.*
4. Make a roux by sprinkling in the flour over top of the onion, pepper, steak mixture and stir. Let it cook down for a minute or two. 
5. (still on a medium-high heat setting) With a wisk, slowly stir in your milk, making sure it gets thick again before adding more milk.
6. Once you've added all your milk and it's slightly thick, add in 1 1/2 cups of each kind of cheese leaving the rest for the topping.
7. Once your cheeses are all melted, add in your noodles, and stir (don't forget to season with salt and pepper!) 
*If you must, now is the time to transfer your macaroni and cheese into an oven safe dish*
8. Sprinkle your panko bread crumbs on top of your mac n' cheese and then top off with the rest of your leftover cheese.
9. Place in the oven and bake for about 15 minutes
10. Enjoy!


Tuesday, August 12, 2014

Recipe : : World's Best Snickerdoodle Cookies!


If you're on the hunt for the perfect snickerdoodle cookie, stop right here! 
These cookies turn out perfect every time. They are light, buttery, slightly crisp on the outside and soft and chewy on the inside. They go perfect with a cup of coffee or tea and can be enjoyed any time of the day. I have slightly altered this recipe, but the original can be found HERE.

Ingredients

* 1 cup of soften butter
* 1 1/2 cups natural granulated cane sugar
* 2 eggs
* 1 tsp. pure vanilla extract
* 2 tsp. cream of tartar
* 1 tsp. baking soda
* 1/2 tsp. real, all natural salt
* 2 3/4 cups of unbleached, all purpose flour
--------
* 1/2 cup natural granulated cane sugar
* 2 tsp. Cinnamon

To Make

1. Preheat oven to 350 degrees F. (or you can wait to do this step until after the dough has chilled)
2. In a large bowl, cream together your butter, eggs, sugar & vanilla until nice and "fluffy".
3. Next, mix in your cream of tartar, baking soda & salt until well incorporated
4. The last thing to mix in is your flour. Stir until there is no more flour visible and everything looks smooth.
5. Place the cookie dough in the freezer for 10-15 mintues to let everything rest and firm up a bit.

**While your dough is chilling, in a smaller bowl, mix together your 1/2 cup sugar and 2 tsp. cinnamon.**

6. After your dough is done chilling, with a small cookie scoop, scoop out your dough and one at a time roll the entire ball in your cinnamon and sugar mixture.
7. Place your balls of cookie dough on a parchment paper lined cookie sheet and ever so gently press down on your cookie dough balls (as pictured below)
8. Once your cookie sheet is filled up, place them in the oven for 8-10 mintues (I found that 8 1/2 minutes is the perfect time for me.)
9. Once done, let them cool and enjoy! 


Monday, July 14, 2014

Recipe: : Scrumptious Chickpea Sandwich


If you'd like an alternative to the classic Tuna Sandwich or you're just looking to switch things up a bit at lunchtime, then look no further than my Scrumptious Chickpea Sandwich!
This sandwich is amazing! Seriously. Full of fresh flavor and healthy nutrients, how could anyone not love this glorious spread?! (Just a side note - my young children loved it too!)

Ingredients
* One 15oz-ish can of chickpeas (also called garbanzo beans) - drained, rinsed & dried
* 2-3 TBS mayonaise
* 2 tsp dill relish
* 2 green onions, thinly sliced
* 1/2 tsp dried dill
* 1/2 tsp dried parsley
* Squeeze of lemon juice
* Salt & Pepper to taste

To Make
1. Take your drained/rinced/dried chickpeas and place them in a large bowl and mash with a potato masher or fork until you've reached a desired consistancy.
2. Add in your mayonaise and stir until well blended.
3. Add in the rest of the ingredients and stir until everything is mixed in nicely. 
4. Spread on sliced bread or crackers if you prefer.
5. Enjoy!!
 (Don't be afraid to play around with the flavors in this recipe! If you like more dill, by all means add more dill! You get the idea.)


Saturday, January 11, 2014

Recipe: : Easy Honey-Ginger-Lemon Syrup


For when you're feeling a bit under the weather, this lovely syrup is just the thing to lift your spirits! 

Easy Honey-Ginger-Lemon Syrup

*Clean Glass Jar
*Honey 
*Ginger
*Lemon

As you can tell, there are no exact measurements here and there doesn't really need to be. It's all based on your own personal preferences. Here is how I did things: :

I took one lemon. Sliced it and then quartered the slices (remeber to remove any seeds!). I then added most of the pieces to the jar, leaving only a couple pieces behind.
I cut about an inch and a half piece of ginger, cut the outer layer off and then diced it into small pieces and then added all of it to the jar.
Finally I poured some honey (any kind you like, raw is prefered.) over the top of the lemon and ginger until it was close to the top of the jar and then with a spoon or fork, mix and smash the syrup to help release some of the lemon juices. 
The syrup will be thin. 
Now pour yourself a glass of hot water (be careful!) and add as much syrup to your mug as you would like (I used about 2 teaspoons for my first mug and feel like I could have used a little more.)
stir and enjoy! 


Wednesday, January 8, 2014

Recipe: : Simple Pecan-Date Bars


Let's be honest. Lara Bars are expensive. It's only been on the rare occasion that I've eaten one and everytime I do, I think "I could have just made that!". There are currently 1.3 million copy cat recipes out there for Lara Bars (okay, maybe that number is inaccurate.) I figured I should contribute at least one more. 
I have made tons of Lara Bar variations in the past, but my most current one is a new one for me and it was delicious! 

Simple Pecan-Date Bars

* 2 - 8oz bags whole pitted dates
* 1 - 10oz bag whole pecans
* 1/4 - 1/2 cup dried, shredded coconut (start with a small amount first - you don't want the bars to be too crumbly!)
* 1 - 2 tsps. vanilla extract

* First, in a pan, toast up the pecans. (medium heat for a few minutes - constantly stirring until fragrant. Don't burn them!)
* Next, add all of the ingredients in your food processor and pulse for a few minutes until everything is chopped really small. When it starts to sort of "clump", it's probably ready. 
* To test and see if it's ready, take a small amount out of your food processor (while it's turned off of course!) and squeeze it together or roll it into a ball. If it sticks together, then it's ready!
* Get a small glass dish (or whatever shallow baking dish you have) and press the mixture in evenly.
* Sprinkle some shredded coconut on top and press (optional)
 * Place the dish in the fridge for 15- 20 mins to set
* Cut into pieces and enjoy! 


*Notes*
- I purchased my dates from Aldi. One 8oz bag only cost me $1.99!
- I had forgotten to oil my glass dish, but as I found out, after toasting the pecans, the oils released from them helped keep them from sticking to my glass dish.
- Even though your dates will say "pitted", always be careful because there could be pit fragments or even whole pits (like the one I found!) 


Saturday, October 26, 2013

Recipe: : Mama's Refried Bean Soup


This recipe is very near and dear to my heart. It is a soup I've been eating since I was just a girl and every time I eat it, I think of home. The soup I'm talking about is Refried Bean Soup and it is a most delicious soup indeed. 
My mother found the recipe on the back of a can of refried beans and decided to try it. Of course, she tweaked it a bit to fit her own tastes (she decided to use ground beef instead of steak pieces).
I do hope you will give this soup a chance. You will not be disappointed!

(Recipe after Pictures)


Refried Bean Soup

For the meat
* 1lb. lean hamburger
* 2 tbs. chili powder
* 1 tsp. garlic powder
* 1 tsp. cumin
* 1 medium onion (any kind you like) diced
* salt and pepper to taste

-Part One-
In a large soup pot, add your hamburger, diced onion and all of the spices. 
Cook the hamburger on medium heat and until it is cooked thoroughly and the onions are soft. 
Turn the heat off and start on Part Two

For the soup
* Three 16 oz. cans of  refried beans (any kind) 
* 3 cups of beef broth
* 1 small can of diced green chiles
* One 6 oz. can of black olives, sliced
* 1 large green bell pepper, diced
* 1 cup of frozen corn
* 1 tsp. garlic powder
* 1 tsp. cumin
* Just a dash of cayenne powder
* salt and pepper to taste

-Part Two
Turn your soup pot back on (with the hamburger/onion mixture) medium-high heat.
Add in your can of green chiles, sliced olives, diced bell pepper, corn and spices, stir to combine.
Now add your cans of refried beans. Again, stir to combine.
Once everything is good and mixed, add in your beef broth. 
Continue to cook soup on low-medium heat or until as hot as you would like it to be. 

Serve this soup with shredded cheddar cheese, sour cream or our favorite - Some crumbled queso fresco and tortilla chips!

Enjoy! 

~Kellie

Wednesday, July 3, 2013

Recipe: : Copycat Mellow Mushroom Thai Dye Pizza


Pizza is my favorite food. There, I said it. There's just something about it. I've become quite the pizza perfectionist over the years. My absolute favorite spot to grab a slice (or two) of pizza is Mellow Mushroom. If you've never heard of Mellow Mushroom, I highly recommend looking them up and if you have heard of them, live close enough to one, but have never tried them out - then you better get on that!
My absolute favorite pizza from MM is their Magical Mystery Tour Pizza and you can find my copycat recipe for that here.
The pizza that I decided to recreate most recently was their Thai Dye Pizza. Now, I have never actually tasted their version, but the ingredients looked so unique and fresh, I just had to give it a whirl. The result? A delicious and most unique pizza with flavors that were perfect for summer. (you just can't beat those fresh sliced cucumbers & tomatoes on top!)
So without further ado, here is my version of Mellow Mushroom's Thai Dye Pizza! 
Copycat Mellow Mushroom Thai Dye Pizza
(Makes 1 Pizza)
* 1 homemade pizza crust (I use this recipe)
* 1 cup mozzarella cheese, shredded
* 1/2 cup cooked curry chicken, diced (special instructions below)
* 1/2 cup cucumbers, sliced into quarters
* 1/2 small onion, sliced very thin
* 1 Roma tomato, sliced in halves
* 4-5 basil leaves, sliced thin 
* 2 cloves garlic, minced
* 3-4 TBS olive oil
* 2 TBS sweet chili sauce
* Parmesan cheese for sprinkling (optional)
Special Preparations
* Mix up your dough. When it's risen nicely, roll out and place it on your pizza pan or stone
* For the chicken, precooked works just fine & it's what I used. Just toss your cooked chicken in a pan with a little bit of butter & olive oil. Add about 1 teaspoon (or more if you desire) of a yellow curry powder and sauté for a few minutes. Set aside
* Warm your olive oil either in a microwave (15 seconds) or in a pan (on very low heat) & and your minced garlic. This will be the base flavor of the pizza.
Assembly
Pre heat your oven to 400 degrees F
* Spoon your olive oil & garlic mixture over the dough, spread evenly. (you can even drizzle a little over the crust)
* Sprinkle your cheese evenly over your olive oil & garlic base
* Add the curry chicken
* Add sliced onions
* Bake pizza for 15-20 minutes or until crust is a nice golden brown & your cheese is just toasty
After baking instructions
* Once the pizza is taken out of the oven, add your fresh sliced cucumbers & tomatoes
* Add your sliced basil
* Drizzle the sweet chili sauce in a nice swirl over the pizza
* Sprinkle parmesan cheese (optional)
*Enjoy!
I truly hope you enjoyed this pizza & if you've tried the real thing, let me know how close this came!
~Kellie

Wednesday, June 19, 2013

Recipe: : Homemade Playdough!


 First let me say, my kids love playdough. I mean, what kid doesn't? They love playing with this homemade version and the last batch their grandmother made for them to play with at her house is still going strong and it's been at least a month since she made it! I thought though that it's probably time for a new batch. This time however I wanted to make it a little more special and decided to add in some awesome glitter and some essential oil to scent it! I also didn't have any food coloring on hand so I colored it (very lightly) with some turmeric powder.
Below is my version of a very basic playdough recipe.
*Homemade Playdough*
(If the little ones want to help, let them knead in the glitter!)
*2 cups all purpose flour
*2 cups water
*2/3 cups of salt (I used kosher salt)
*4 teaspoons cream of tartar
*2 tablespoons olive or melted coconut oil (I used olive oil)
*Approx. 1/2 teaspoon of turmeric for color (use more or less, it's totally up to you)
*5-10 drops lavender essential oil.
**Extra Fine Glitter**
(do not add glitter until the cooling stage)
--Pour your dry ingredients into a pot and then add in your wet ingredients.
--Stir on medium heat for about 5-10 minutes or until your mixture starts to thicken and then eventually pulls away from the walls of the pot. (trust me, it will get VERY thick!)
--Once everything is combined and has formed a ball in the pot, scrape the playdough on to a floured counter top and allow to cool. (you may need to mix in a little flour to your dough as it cools)
--If the dough is too hot to handle, just wait a few minutes and then add in your glitter - now would be the time to let your little ones help knead in the glitter! (I added approx. 1 tablespoon of extra fine glitter to this batch, but the amount is totally up to you!)
--Enjoy! No doubt this will bring many hours of fun for your little ones!!


Tuesday, June 18, 2013

Recipe : : Creamy Spinach Dip


I was craving a delicious, warm spinach dip lately and after spending some time on Pinterest, I found some that looked good, but none of the recipes were exactly what I wanted so I just decided to take the best from what I could find and create my own version of a warm spinach dip!
My recipe is very laid back. You really can't go wrong and you can even tweak it to make it your own.

Creamy Spinach Dip

*8oz package frozen chopped spinach - thawed & drained)

*Half of one onion - sliced very thinly
 
*2 cloves of garlic - minced very finely

*8oz cream cheese - room tempature

*1 cup of parmesan cheese - fresh or powdered is fine

*1/4 cup (or so) of mayonnaise

*2 tablespoons olive oil or coconut oil

*2 teaspoons salt

*1 teaspoons black pepper

(*1-2 tablespoons of milk to thin out - optional)

--Heat a skillet to about medium heat and add your oil to the pan
--Once your oil is hot, add In your onion and garlic (you want them to become nice and soft, not burnt!) Stir often.
--After your onion and garlic are nice and soft, lower the heat a bit and add in your drained spinach and stir.
--Now add in your cream cheese and stir until it is well incorporated with the spinach, onions & garlic mixture. (smashing with a fork helps)
--After the cream cheese is blended, add in your mayonnaise, parmesan cheese, salt & pepper (mix well!)
-- Now turn off your heat and transfer the dip into a bowl and serve with corn chips & veggies!

I hope you enjoy this dip as much as I did!

Feel free to share this recipe on Pinterest!


Friday, March 15, 2013

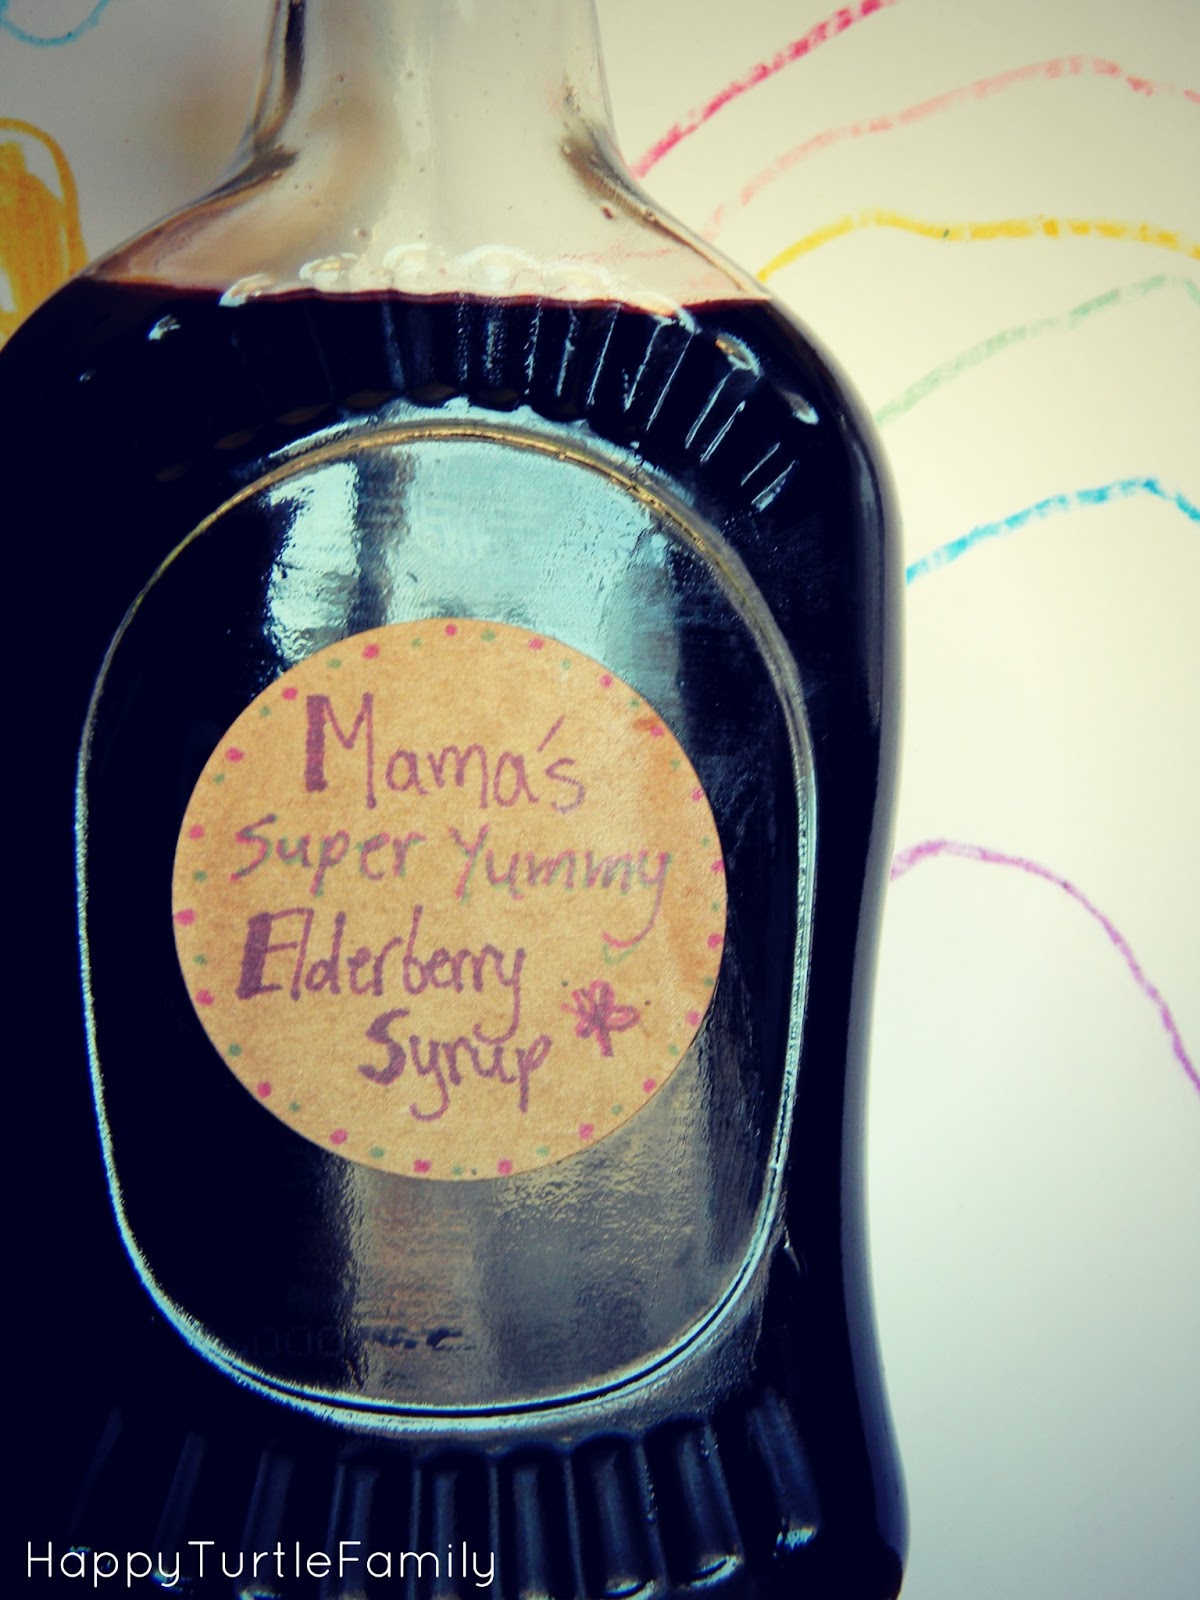
: : Recipe : : Elderberry Syrup


Just when I thought my children were over their colds, another one hits. That is where my homemade elderberry syrup comes into play. This stuff is awesome. I always feel good taking it and it's a cinch to make! I use to buy mine, but when I found out how easy it was to make, I will never buy it already made again! My version is VERY simple & basic as you will see.

To make enough elderberry syrup to fill an old maple syrup glass bottle (12.5 oz) you'll need: :

* 1/2 dried elderberries (I got mine from here ) remove any twigs and stems!
* 2 cups of filtered water
* 1/2 - 2/3 cup raw honey or maple syrup (or a combination of both as I had to do due to the fact I ran out of raw honey)


Now, place the water and elderberries in a heavy pot and simmer on low-medium heat for about 30 minutes.
After 30 minutes is up, strain the liquid to remove the elderberries and place the liquid in a glass bowl and stir in your honey/maple syrup.
Using a funnel, pour your elderberry syrup into the glass bottle and that's it! Easy as pie.
Keep your syrup in the refrigerator (I wouldn't keep it longer than a month).
Dosage is typically 1tbs daily for adults and 1tsp daily for children.
** NEVER give honey to children under 1 year old!! **
Here's to good health! Enjoy!
~Kellie


Monday, February 4, 2013

Creamy Smoked Gouda & Cheddar Pasta Salad


About 7 years ago or so, I was introduced the the Smoked Mozzarella & Penne Salad from Whole Foods and I have been in love ever since. It was always a rare treat for me to enjoy this pasta dish, as it is quite expensive, but a couple of years ago I struck gold! This recipe is as close as you can get to the real thing in my opinion. I usually make just a few changes to the recipe. I like to switch it up every now and then and use different cheeses, but I always like include some sort of smoked cheese. This time I used two : : smoked gouda & smoked cheddar! Mmmm..... I also ended up using fresh sweet peppers instead of the roasted red peppers, frozen chopped spinach instead of fresh baby spinach and I left out the parsley. Even with all of those changes it still is the best pasta dish ever - my favorite in the whole world!  Seriously, try this dish!

My Version
(Recipe is doubled)

~Creamy Dressing~
* 1/2 cup parmasan cheese
* 1 cup mayo
* 1/2 cup white wine vinegar
* 4 cloves of garlic, minced or grated on a zester
* salt & pepper to taste

Mix everything together in a big bowl and set to the side

~Pasta Salad & Veggies~
* 1lb of penne noodles (or whatever noodles you prefer)
* 1 cup frozen chopped spinach, thawed and drained
* 3-4 mini sweet red peppers chopped julienne style
* 1lb cubed smoked natural cheese (I used smoked gouda & smoked cheddar)

Cook the noodles until al dente, drain and rinse under very cold water. Add the noodles and veggies to the creamy dressing. Stir and let sit in the fridge for at least an hour or until nice and chilled. Serve and enjoy!


Sunday, February 3, 2013

Making Cranberry-Ginger Bread In Pictures


This is a MUST try recipe! 
(I did make a few changes, but the original recipe can be found here)

Monday, July 30, 2012

: : Recipe : : Peach Tea Infused Lemon Marmalade


Yesterday I was feeling creative. I knew I had a few sad looking lemons lying around and wanted to make something with them before they needed to be thrown away. I wanted to make something with the lemons that I never made before. I took to searching the Internet and found a recipe for Meyer lemon-lavender marmalade. It looked simple enough, and even though I wasn't planning on adding the lavender, I had something else up my sleeve.  Now, this is the first time I had ever tried my hand at making a marmalade of any kind, so I was sort of just going with the flow. I knew that I wanted yummy and simple summertime flavors in this marmalade, which is what sparked the idea for adding in a peach tea bag to the simmering lemons and also a splash of pure vanilla extract. The results? Delicious!! Now, there are a few things I would do a tad differently the next time around, but this batch will do just fine.

Peach Tea Infused Lemon Marmalade

* 3 medium sized lemons
* 1 cup of water
* 1 cup of sugar
* 1 peach tea bag (I used Celestial Seasonings brand)
* 1/2 teaspoon pure vanilla extract

-First, you'll want to wash your lemons and slice them into quarters, slicing end to end and remove the seeds.
-Next, slice the lemon quarters crosswise into small, thin slices (It's important that these pieces are rather small! I think mine were too big. Oops!) 
-In a heavy bottom sauce pan, add the sliced lemons, 1 cup of water and your tea bag.
-Simmer together on medium heat for about 15-20 minutes until the lemon peels are nice and soft, stir occasionally.
-After the lemon peels are nice and soft, take the tea bag out of the simmering mixture and add in your sugar and vanilla and simmer for another 15-20 minutes.
-Check your pot to make sure you have enough water while it simmers. (This is another thing I would change with what I did, I feel it got too thick too quickly, I would have liked it to be more smooth in the end and a little extra water probably would have done the trick!)
-When it's all done simmering, pour into a mason jar and leave it at room temperature for a little while before sticking it into the fridge.
-Enjoy on warm buttered toast or crackers and cream cheese!

Remeber, this was my first time attempting to make a marmalade and if you attempt to make this recipe, I really hope it turns out as lovely for you as it did for me! Tweak the recipe if you must!

~Kellie


Monday, March 12, 2012

Spring Cleaning Spray Recipe!

Natural, homemade cleaners are nothing new to most of us, but I ran across an "all purpose" cleaning spray recipe today (website below) that had the most wonderful essential oil combination so I just had to share it here with you. 

All Purpose Cleaning Spray

* 32 oz Water
*1 Tbs White Vinegar
*10 drops each of Tea Tree essential oil
and Lemon essential oil
(I did not use the eucalyptus oil as written because I am currently out of that EO)

*Add all ingredients to a large spray bottle, shake for a bit and you're good to go!

I just LOVE the scent combination of tea tree EO and lemon EO. It smells so fresh and clean, perfect for this time of year.

(Recipe adapted from : : Plant Life World)


Sunday, January 29, 2012

Black Bean + Roasted Sweet Potato Burritos

 (purple & orange sweet potatoes)
**This recipe was posted on Crunchy Catholic Momma, for her "Meatless Friday Meal Recipe Link Up"**


I love to cook, so from time to time I thought I'd share a simple recipe, sound good? As I was sitting around thinking to myself what in the world should I cook for dinner, I remembered that I had picked up some gorgeous deep purple sweet potatoes from the Asian market! I have never had the purple ones before and loved the color and I knew I had to make something with them. I had heard of people pairing black beans with sweet potatoes, it sounded like a yummy combination, so I thought burritos! 
So I put my thinking cap on and thought what spiced would be good? I wanted them to have a Mexican flair, so I the obvious ingredients came to mind, cumin, chili powder, etc... But them I remembered I had bought a curry powder mix from the Asian market that contained all kinds of delicious ingredients such as cumin, coriander, chili, cinnamon, fennel, and a few more and thought that would work just fine! So came together my lovely mixture of veggies and spices and a beautiful burrito was born! I hope you all enjoy these as much as my family did! 

Black Bean + Roasted Sweet Potato Burritos
(as with all of my recipes, hardly any measuring actually takes place, so just use your best judgement and make it your own! Also, feel free to replace any ingredients, just think of my recipes as guidelines!)

* 2 Sweet potatoes, diced into small cubes (any variety will work)
* Half of an onion, diced
* 1-2 Tbs Curry spice (any kind you like) or Mexican spice mix
* 2 Tbs Coconut oil (melted) or Olive oil
* 3-4 Cups cooked black beans
*Tortillas
* Prepared Salsa, Grated Cheese, Sour Cream, Lettuce, Etc...

Take your sweet potatoes and peel and dice them into small cubes. Dice up your onions. Put the sweet potatoes and onions in a roasting pan. Coat in oil and sprinkle in spices. Toss to coat. 
Place roasting pan in a preheated oven at 400 degrees F.
Roast for approx. 15-25 minutes, or until tender and slightly crisp
Take the sweet potatoes out of the oven and add them to a pan along with the black beans and saute on medium heat in some butter for a few minutes.
Turn the pan off.
Now it's time to assemble! 

Grab a tortilla and scoop some of the black bean + roasted sweet potato mixture in and add toppings! Easy as that! Simple, frugal, nourishing, and most importantly yummy!!!!! 

Enjoy!


Wednesday, September 28, 2011

Cleaning Cloth Menstrual Pads


I have been using cloth menstrual pads for around 3 years and I *love* it. I have found there are many ways of cleaning cloth pads. Much like cloth diapers. It's all about personal preference. Here is my method : : after I am done with a pad, I simple wrap it up until I take my shower (which is usually more frequently done when I am on my period) and rinse them out (yes, by hand) in the shower. I ring them out as best I can, then I toss them in the wash, usually a hot wash with the towels and dry in the dryer. It's as simple as that. Now, in the past I would use Bac-Out as a pre-treatment to the pads, but for a good while now I haven't had it on hand, but today I came across a video that talks about how to wash cloth pads and they had a recipe for a very simple homemade pre-soak treatment that I love. I tweaked the recipe a bit and here is what I will be using from now on to pre-treat my cloth ::

*Cloth Mentstrual Pre-Soak*

**2 Tb hydrogen peroxide
**2 Tb liquid soap (I used lavender Dr. Bronner's)
**2 cups warm water
**10 drops of eucalyptus oil (for it's disinfecting properties)

*Add all of these ingredients into a squirt bottle/spray bottle and use to pre-treat your cloth pads

I'm really excited that I found this recipe and I hope it really helps get my pads extra clean!

(recipe adapted from Luna Pads)

Saturday, August 20, 2011

Pesto-Tomato-Spinach Sandwich


*Pesto-Tomato-Spinach Sandwhich*
(recipe makes one sandwich)

I created this sandwich today with ingredients I had on hand. I hope you will try this sandwich and enjoy it as much as I did!

*Start with freshley prepared pesto, about 2 Tbs
*2-3 Tbs full fat sour cream
*Half a medium tomato, sliced
*1/4 Cup baby spinach
*1 Mini ciabatta bread loaf
*Pinch of kosher salt
(all measurements approx.)

*In a small bowl, mix the pesto with the sour cream
*Cut open the loaf of ciabatta bread
*Slather the sour cream/pesto mixture onto both halves of the bread
*layer the slices of tomato evenly on the bread
*Sprinkle the salt over the tomatoes
*Top with baby spinach
*Add on the top of the ciabatta loaf
*Enjoy!

(This sandwich would also be lovely with some mozzarella slices or provalone cheese)

Tuesday, June 28, 2011

Slushies!

Summertime is upon us and I've been making slushies! These slushies are so tasty and they require very little work. I didn't measure anything (as usual), but it's all pretty basic.

:: Water+Ice+Fruit+organic sugar+Secret Ingredient = Yummy!

Now yes, I did say sugar (organic)...it's an ingredient that you could use or just use the natural sweetness of the fruit to do the job. I however was using a lot of sour lemons in my recipes, so they required the extra sweetness in my opinion.

 First up, we have the ever so yummy tropical slushie! Pineapple, strawberry, blueberry, and lemon! (a bit of coconut water/milk would be lovely in this!)
 This was more simply a mixture of lemon (about 3 plus the zest of 1 or 2) and a handful off blueberries!
 (Don't you just love that pale pink color?) Again, a very simple blend of strawberry and lemon! It was a toss up between the lemon-strawberry and the lemon-blueberry. They were both soooo good it was hard to decide which one was my favorite.

Oh yes, I almost forgot! My "secret ingredient" for all of these drinks are pure vanilla extract! *shhhhhhhh about 1.5 teaspoons for each recipe. Sooooo good! It really gives it a good balance and makes these slushies extra special. I hope you all are enjoying your summer and if you want, experiment with your own slushie recipes! Different fruits, using honey instead of sugar, coconut milk! I'm sure I'll be enjoying a few different ones this summer.


God Bless!